UNM Zoom Meeting Host Responsibilities
Privacy and respectful communication are the basis for safe, ethical, and productive teaching environments and workplaces. As a meeting host it is your responsibility to:
- Prevent access by those without a legitimate purpose.
- Record meetings only when there is a legitamate business need and secure recordings against unauthorized access.
- Set clear expectations, actively monitor and manage attendee behavior as you would in traditional face-to-face class or meeting.
- Be familiar with in meeting controls to limit disruptive or inappropriate activities by attendees.
Scheduling your meeting
When scheduling a Zoom meeting, you should be aware of a few key settings and options to help keep your Zoom meetings secure and avoid disruptions.
Meeting ID

Security
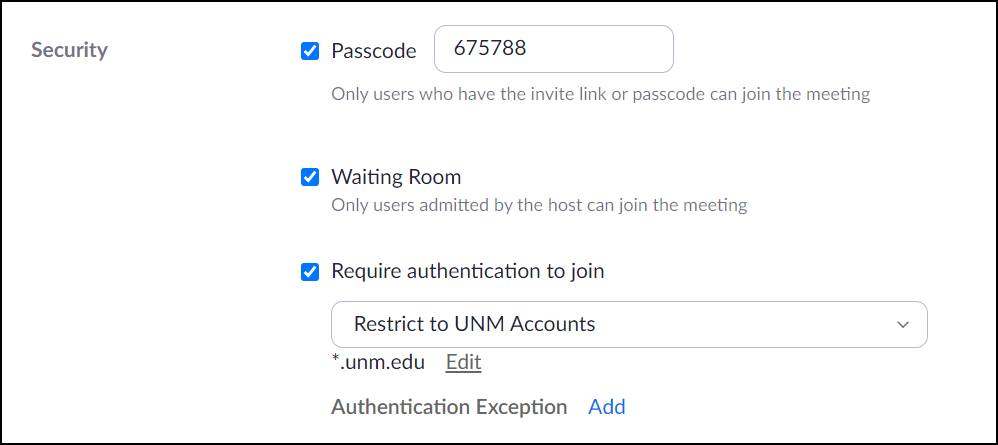
When scheduling your Zoom meeting, you have three options for adding security:
- Add a meeting passcode. For added security, you should generate a meeting password.
- Enable Waiting Room. Allows the meeting host to control who is admitted into the meeting.
- Enable Require Authentication (*.unm.edu). Require authentication for all meetings unless you are inviting non-UNM participants. Specifically, for meetings with students, restrict access to UNM accounts.
Meeting Options
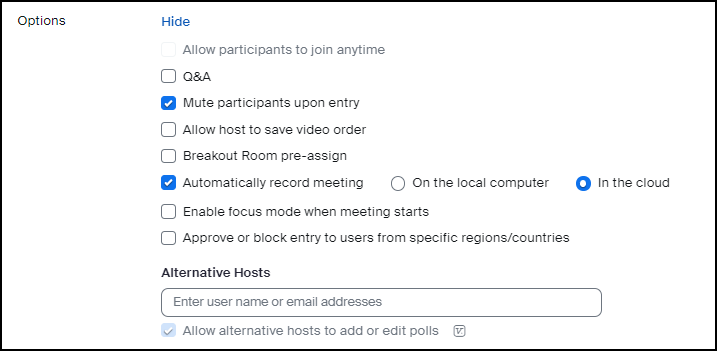
- Do not enable Allow participants to join anytime to prevent others from using your meetings in a way you did not intend.
- Enable Mute participants upon entry. Participants can choose to unmute themselves once the meeting is underway. Enabling this option will prevent disruption as participants join.
Inviting participants and sharing your meeting link
Only share your Zoom meeting link with your intended participants.
- Class meetings should be added to UNM Canvas via the Zoom tool link.
- Sharing a meeting link on social media or other public platforms, may attract potential bad actors.
- Here are some guidelines for hosting an online event, webinar, meeting open to the public, or meeting with a public facing link.
Recordings
Be thoughtful about creating and sharing recordings of Zoom meetings. Meetings should not be recorded absent an articulated business purpose or academic need (including as a reasonable accommodation) that requires recording of the meeting. Before deciding to record a Zoom meeting, ask yourself if you would record the meeting if it occurred in person.
Inform meeting attendees, prior to a recorded meeting, how you intend to record, use, and share video. You may also consider giving attendees options to participate without having their image or voice recorded, such as allowing them to attend with no video or audio, and the option to pose questions only in the text chat window. Because you can start and stop recordings in Zoom at any time, you can choose to include unrecorded time throughout your Zoom session, giving attendees an opportunity to discuss topics or ask questions that they do not wish to have recorded.
Do not share recordings through Zoom’s built-in share feature.
- Recordings In the cloud are automatically copied to Kaltura and retained in Zoom for only 30 days. Continue to share recordings that include the name, voice, or image of students through Kaltura inside of your academic class to leverage appropriate access controls Zoom Recordings and UNM Canvas.
- On the local computer. When a meeting is recorded locally, the recording will be saved on the computer you use to host the meeting. Please take appropriate steps to ensure that there is no unauthorized access or sharing.
- FERPA considerations of Zoom recordings of meetings with students can be found here.
Managing participants and participant behavior during a meeting
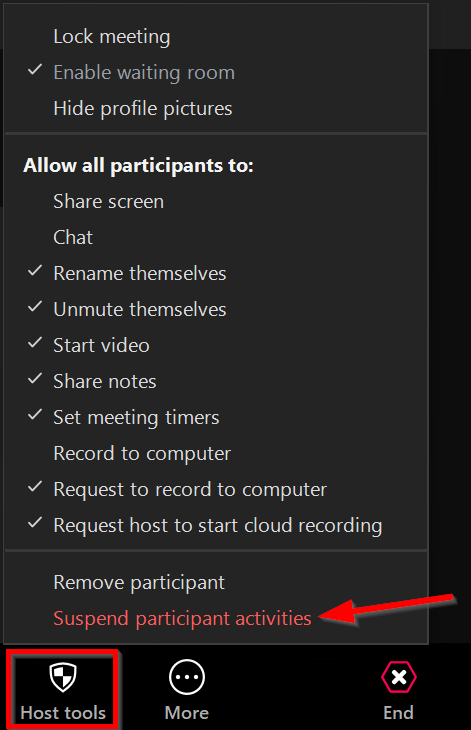
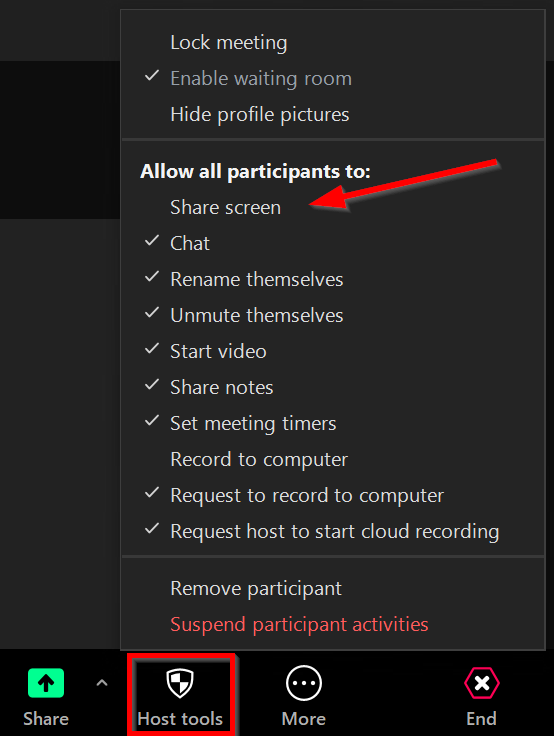
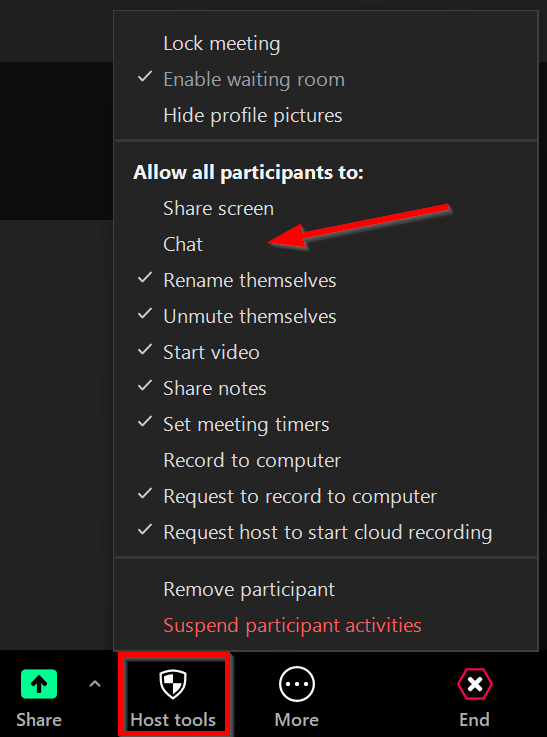
Set clear expectations for participant behavior in meeting you host, and become familiar with host controls found in the Host tools button and Participant's panel to quickly address disruptions and manage participants.
Viewing and managing participants:
As a meeting host it is recommended you open and be attentive to your participants panel.
![]()
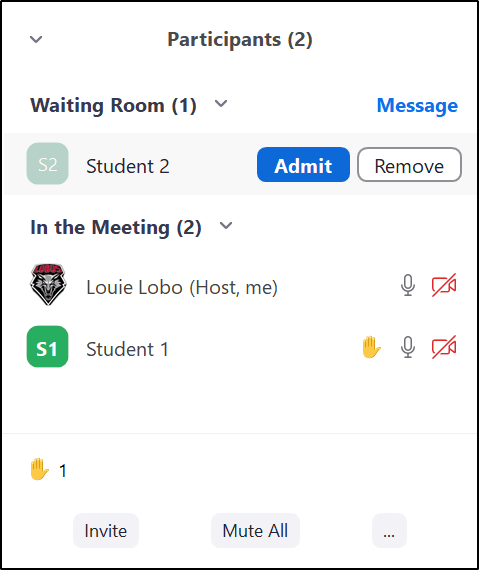
Opening the participants panel allows the meeting host to see who has joined, view non-verbal feedback such as hands being raised, and (if enabled) admit participants from the waiting room.
Limit screen sharing:
Limit participants ability to chat:
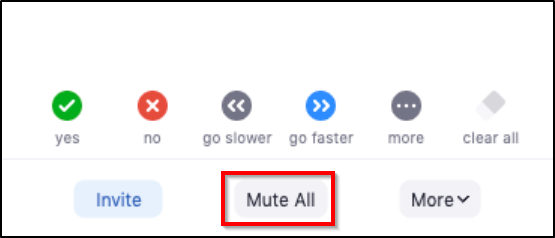
Mute all participants:

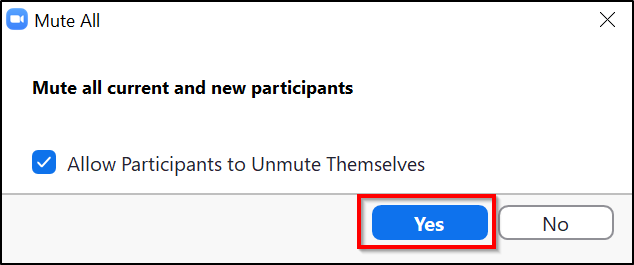
Optional: Check Allow participants to unmute themselves if you would like participants to be able to unmute at any time during the meeting.
Remove participants:
1. Click the Participants button to open the panel for managing your participants. 
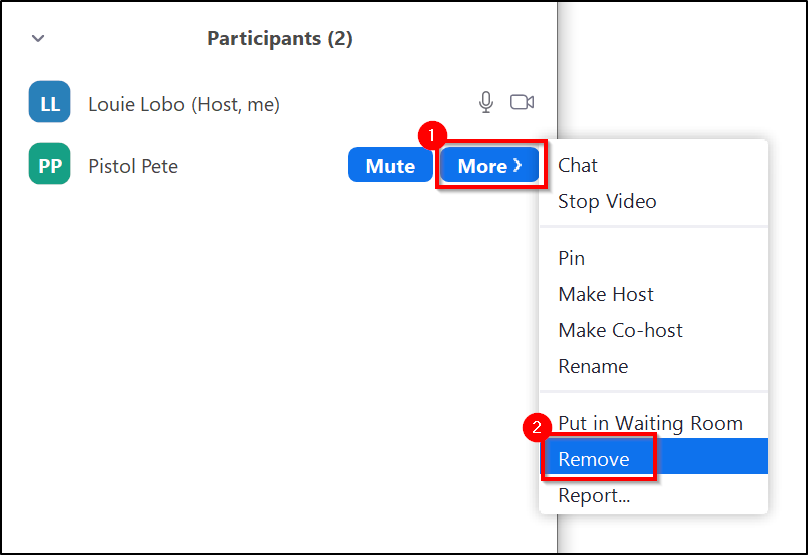
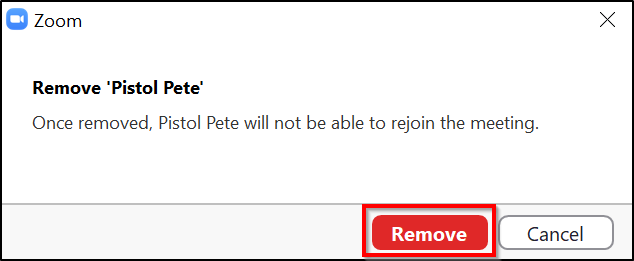
Note: To avoid accidentally removing the wrong participant, you may choose to instead put them in the waiting room. Additionally, malicious participants aren’t prevented from re-joining your meeting from another device or identity, so you should remove participants in conjunction with enabling a waiting room.
Suspend all participant activities
In the event of a major disruption, you can choose to suspend all participant activities (video, audio, and screen sharing) as well as prevent new participants from joining your meeting with Host tools > Suspend Participant Activities.
